Easter Egg Hunt!

Inspired by John Meehan @meehanEDU this morning, I ordered myself some plastic eggs off Amazon and set to work on some questions for Year 11, specifically for AQA GCSE biology.  I thought it’d make a nice year group competition just before we break up for Easter.

Today, I went through the AQA biology specification for GCSE and wrote out some simple questions. I’ve printed them and cut them out ready to stuff into eggs tomorrow when they arrive. I made a score sheet and a wrote a message to tutors (see resources section below). On the Monday morning I’ll go in and hide the eggs all around school, inside and outside. The students can then find them through the day, and go hunting at break and lunch. Feel free to use this, and adapt it in any way you wish, but it’s not to be sold!

Resources:

Y11 Easter Egg Hunt Message to Tutors

Y11 Easter Egg Hunt Poster

Y11 Easter Egg Hunt Qs (AQA GCSE Biology)

Y11 Easter Egg Hunt Score Sheet


AQA A-level Biology Exam Preparation

As well as the subject content for A-level Biology, there are several skills which students need to re-visit prior to their exam. Here are some resources to help you prepare your students.

IMG_2836

Past ISA and EMPA papers (Biol3x/3t/6x/6t) are great practise for the required practical question. Most of the required practicals have been taken from past ISAs and EMPAs so there are a lot lurking around. Section A of the papers is great for the actual practical skills, but section B is also great for source evaluation and general AO3 skills.

ISA1ISA2ISA3

I’ve also gone through all the past papers I could find and have put together this booklet of questions on the 12 required practicals which my Y13 are currently working through. It’s a bit rough around the edges but it’ll do until I get time to tidy it up and edit the mistakes the kids have found.

Required Practical Question Pack blog

Required Practical Question Pack MARKSCHEME

I also make sure I go through the practical hand book with them with a fine tooth comb; here is a booklet with the stand alone methods. I get students to think of these as transferable techniques, e.g. the random sampling technique could be used in a huge forest or on a microscopic level, or the aseptic technique method could be used to grow microbes or stem cells. Once we have done the questions we make a note of things that have come up in past papers and what the model answers are.

Required Practical Methods Booklet

IMG_2837

This CGP book isn’t AQA specific but it’s a great way of allowing students to review their maths skills and do some practise. There are a lot of questions for them to have a go at and self-check in the back. The only thing you need to do to make it AQA specific is warn them they don’t need to be able to do the stats tests, and there’s an extra diversity calculation they don’t need to know.

cgp

I’ve also gone through past papers and pulled out all of the maths questions and arranged them by topic. This will allow them to work out what kinds of maths skills they need to work on.

Maths and Stats Past Paper Questions Booklet 2018

Maths and Stats Past Paper Questions Booklet 2018 ms

IMG_2838

I never know what to call this skill, so it either ends up being called “Working Scientifically” or “How Science Works” which are the questions that want the students to know about good experimental design. Ideas such as sample size, placebo effect, bias, variables, correlations, causal relationships and so on. Here are some great questions to do together as a class using a visualiser. If you read the question aloud and talk through what’s going on in your brain it really helps them.

HSW qs from June 2016

HSW Qs 2016 MARKSCHEME

How Science Works Questions

How Science Works Qs MARK SCHEME

IMG_2839

AQA have provided this list of essay titles and associated mark schemes on their website.

I don’t have much to offer about the essay as my co-teacher covers this skills with our class.

IMG_2840

You can find information on two of my previous posts about how I approach the exam preparation period

https://pedagoggles.wordpress.com/2019/03/16/practise-practise-practise/

https://pedagoggles.wordpress.com/2019/02/15/monitoring-independent-exam-preparation/

SLOP: Practise, practise, practise!

At this time of year, with Year 11 and Year 13 students have finished the taught element of the course and are busy preparing for their public exams. Whilst there are a lot of ‘fun’ activities they could do to prepare, in my opinion there is nothing more useful than practising exam questions. I think we need to send the message to our students that there is no magic revision pill, and that learning requires hard work. Making and playing board games etc could well take an hour of useless messing about for a ten minute gain.

Developing exam technique from the start of the course:

I don’t just confine this type of practice to exam classes; year 9, 10 and 12 have many of their homework’s based around practising past paper questions. With Year 9 and 10 especially I try not to mention exams too often during lesson time and just enjoy learning about the content, but I do introduce GCSE skills from Year 9 (we have a three year GCSE). My current year 9 class have tried out quite a few GCSE questions now and are getting too grips with their requirements for precise language. A few weeks ago I was looking at a respiration question with 9AG and we talked about including “magic words”! We looked at a 3 mark question and I asked how do I know how many magic words to put down. Joe replied “4” which is what I’ve been training them to do. We discussed the “magic words” to include (oxygen, energy, anaerobic, lactic acid, fatigue) and then they put them into sentences.

Year 10s get past paper questions for each topic so they can see them kinds of things that get asked. They’re currently working on Required Practical 10 and can see that the same points crop up over and over again in the mark schemes, and are making a careful note of these.

Year 12 (and 13) have chapter by chapter past paper question booklets which they generally do for homework. I try and include pretty much every past paper question I’ve found on the topic by going through past papers and having millions of tabs of Word open. I make markscheme booklets too. They’re due for an update as I need to include more some new specification questions. Because they’re topic specific they tend to be AO1 and AO2 questions. I actually love it when the students start to moan: “Argh not that question again! I’ve written that same answer out 3 times now! Mutation changes the DNA sequence, thus the primary structure of the protein. Hydrogen bonds form in different places. Tertiary structure changes. Active site changes shape. Enzyme substrate complex can no longer form” I know my Year 12s could answer that question with their eyes shut now, so if they get it in their Alevel they can zoom through it and spend more time on the more taxing AO3 questions.

An example of an Alevel past paper question booklet

Once a topic is complete we make a Common Exam Questions sheet (affectionately known as a yellow sheet to the students because I have them printed on yellow paper to make them stand out). The aim of this is to check wording against the markscheme and make a note of the points accepted year after year. Here’s an example of a “yellow sheet” for one of the Alevel topics.

Preparing for the GCSE examination


Although much of the leg work is done throughout the course with the ideas mentioned above and frequent retrieval practise, the remaining term in Year 11 and Year 13 is dedicated to practice. Each student in our department is given a stack of topic by topic past paper questions with markschemes and is expected to work through them in lesson time and at home. I have sticker charts to monitor progress and harness the power of peer pressure for good! My Year 11s have a few taught sessions about skills, but then crack on independently. I do not re-teach content and I do not run extra revision sessions outside the lesson; in my opinion this sends the message that it was not important to pay attention the first time around. Having said this, I will always spend time with students who have tried to help themselves but have hit a brick wall.

In my current year 11 lessons I circulate around the room, offering help where needed. Some work on their own, and some prefer to sit in pairs and talk through the question together. We work hard for 30 minutes, then stretch our legs for 5 minutes then crack on again for the rest of the lesson. I encourage them to “work hard and play hard” – in class they need 100% focus and when relaxing they need to completely switch off.

They quickly spot how to answer questions by using the markschemes and get faster and faster at answering. When it comes to their exam, their cognitive load will be greatly reduced, allowing them to dedicate more of their memory to new questions. Year 11 students have 22 topic question packs, but together by my HoD, and the 10 required practicals with associated questions as you can find on my blog. They also have a booklet of maths questions and a booklet of “how science works” questions to work through. I strongly dissuade them from making pretty notes – notes and flash cards etc have been made throughout the course for end of year exams and mocks; now is the time to practise.

Preparing for the Alevel examination

In much the same way, my Year 13 students are spending their time looking at past paper questions, as well as some taught sessions on skills. They too have their own sticker chart (because you’re never too old for stickers). Again, this harnesses the positive power of peer pressure and drags along some of the less motivated students. It amazing to see how excited 18 year olds get at the start of the lesson, putting their stickers up!

Their chart has sections for topic-by-topic question packs which I have told them are their responsibility to do at home, maths and stats practise, something I call “How Science Works” (a term from an old spec – concepts like experimental design, placebo effect, sample size etc), required practical questions, full past papers and old spec synoptic papers. A colleague is working on the synoptic essay with them. We have managed to sit down and talk through four required practicals per lesson for the last three lessons, and they’ve completed some past paper questions at home. I hope to be able to upload some of this material this weekend if I have time.


Apologies if I’ve misused practise / practice in this post; I tried!

Teaching With Booklets

I started using booklets a few years back and they seem to be getting pretty fashionable now, so I thought I’d share some of mine as examples and tell you why I love them!

IMG_2215

What is a booklet?

The booklets I make are an A4, saddlestitched booklet which covers one topic. They usually have a front cover with a catchy image which captivates students at the start of a new topic and summarises what that topic is about, the specification for that topic to use as a checklist, some bubbles for definitions, some fill-in-the-blank notes, blank summary tables, spaces for practical work, crosswords and other puzzles, some practice examination questions, and sometimes space for revision or feedback from a test. It’s basically a text book crossed with worksheets and practise questions all in one.

Why are booklets awesome?

With my Y8 and Y9 classes at my current school, they are only timetabled for biology either once or twice a week, so retention of knowledge was a little weaker, and I felt like I was spending too much time on getting students to make notes or glue things in their exercise books. With not seeing them very frequently, I find collecting in homework a pain, and helping absentees catch up difficult. With the booklets, I can very quickly see who is missing work and we can spend more time discussing and doing practical work in lesson time. Plus homework sheets don’t get lost and everyone stays nice and organised. I use my visualiser to model how to complete work and the combination of visualiser and past paper questions have been wonderful in helping my Y9s who are new to GCSE skills, get used to how to break down an exam question and understand about command terms and exam technique. On a personal note, it means I have to think about photocopying once a topic rather than before every lesson. Theoretically I could do all of my copying for the whole year at the start of the year (but the storage would annoy me and our repro goddess would kill me).

IMG_2218

What are the downsides to booklets?

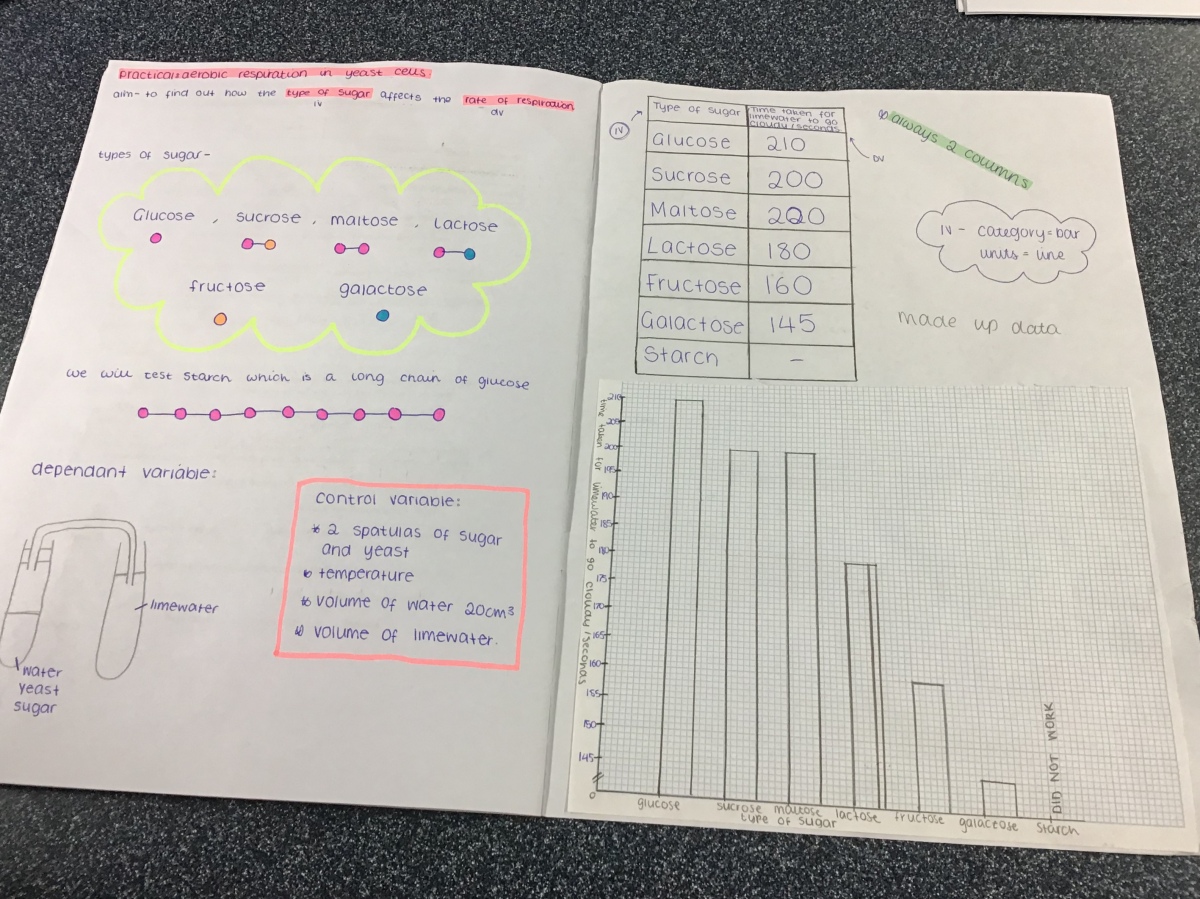
The obvious one is the expense; each booklet probably costs about 40p to produce and my Y9 have five topics in the year. Though if you balance that against the cost of an exercise book, more glue sticks and printing of homework sheets and practice questions it might well balance out. Another downside is the lack of flexibility; it means I have to pre-plan what I want to do in that topic, and if a student wants to take learning in a different direction, there isn’t room for that in the booklet. I try to leave a couple of blank pages in the back. Last week I winged a practical with Y9 about the effect of different sugars on yeast respiration which wasn’t in my booklet, but thankfully I had some blank pages in the back. The other issue I have found is if a child forgets their booklet you need a back up. I’ve taken to copying one extra booklet for them to look at (but not write in) so they can do the questions etc on paper and copy up at home. I’ve also put the booklets online for them so they could see them on their ‘phones if needed.

IMG_2216

Who do I use booklets with?

Most of our department use booklets for Y8. Interestingly, we’ve all adapted the same starting point to suit our own teaching styles which I love. We’ve changed the practicals and questions and examplar materials to suit what we love to teach.

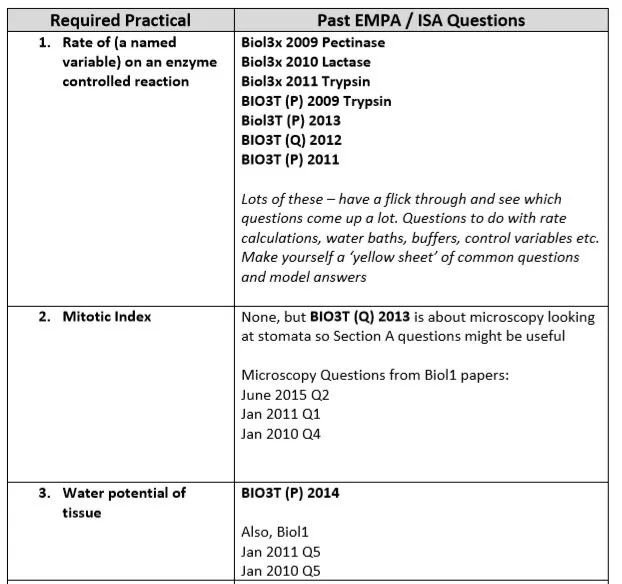
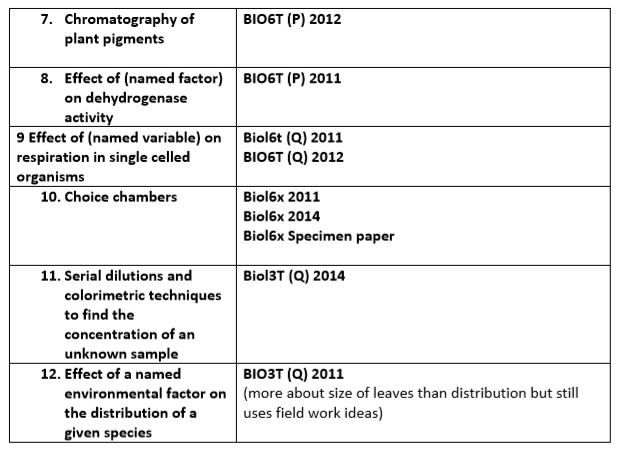
I have started to make them for Y9 due to time restrictions and it’s worked so well. I’ve used them for some Y10 and Y11 topics if they are more self-study topics. Y12 and Y13 biology students have booklets of past paper questions for homework. Y10/11 have work booklets for the required practicals (see seperate blog posts).

I’ve also made booklets for all 8 units of the GCSE Psychology course which has been fantastic, as the course is so discussion-based and I hate pausing to make notes.

Here are some examples of my booklets (school logo has been removed). These match up with the AQA GCSE Biology course. Feel free to try them out and edit them to suit your needs but DO NOT SELL THEM!!

GCSE Biology: Adaptations

~~ ADAPTATIONS STUDENT BOOKLET ~~

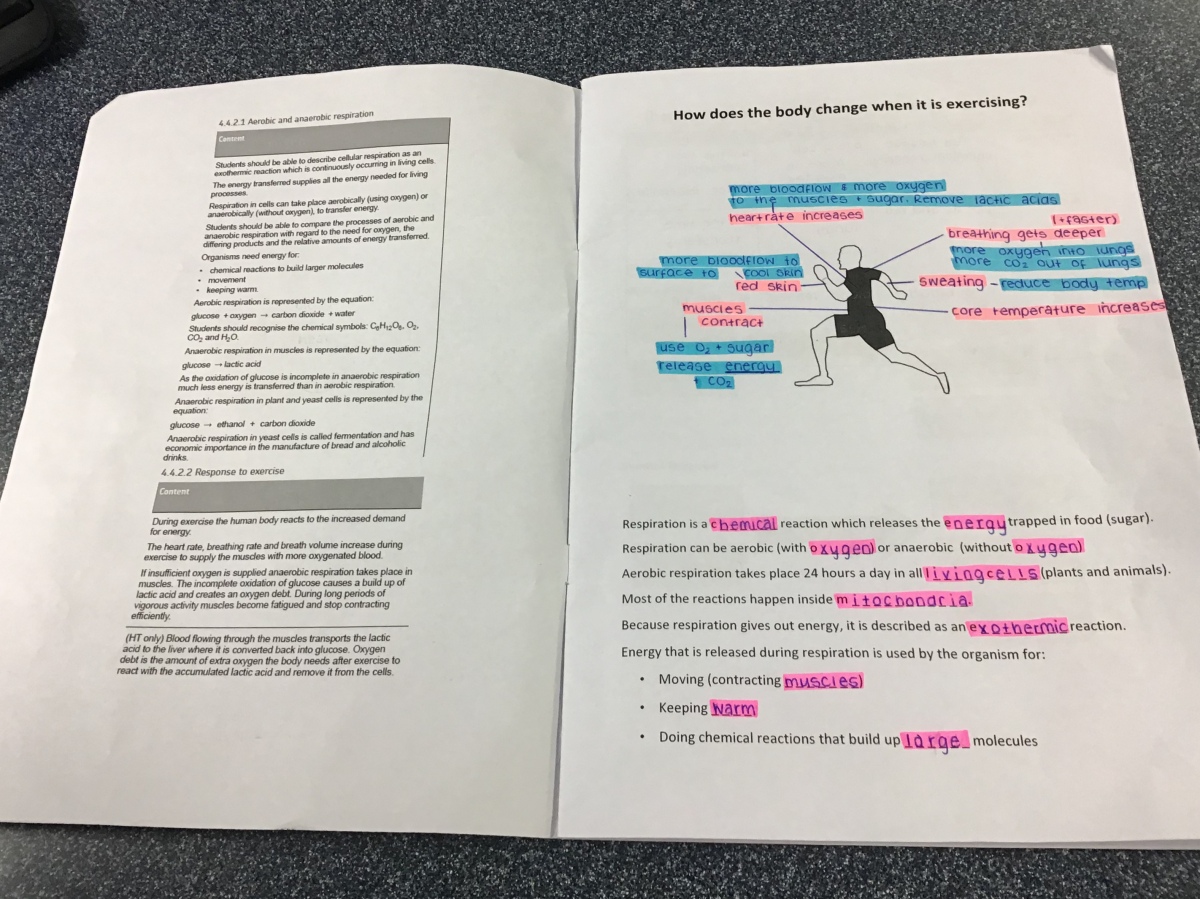
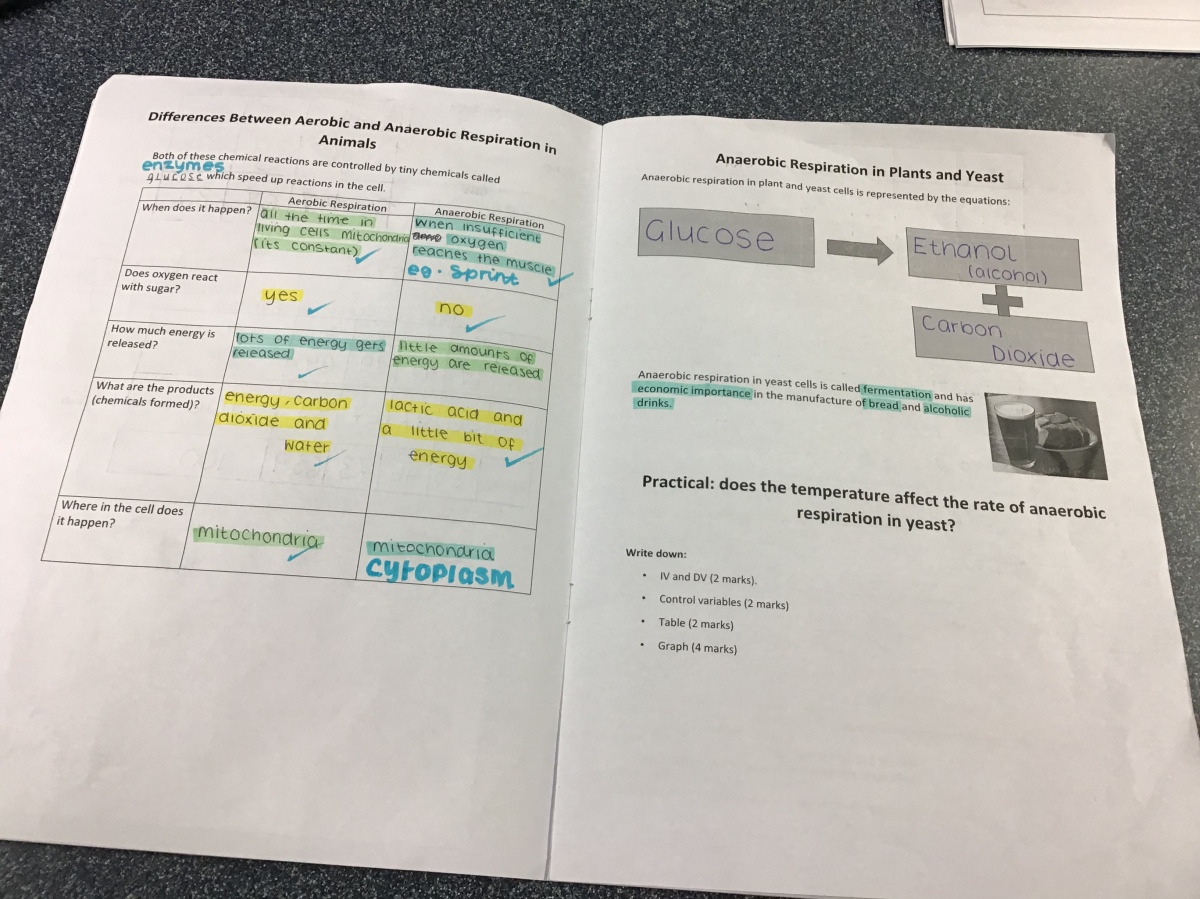
GCSE Biology: Respiration

Respiration Student Booklet

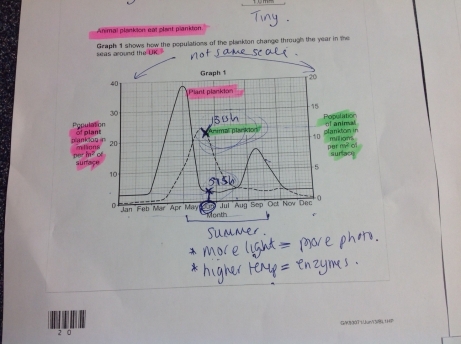
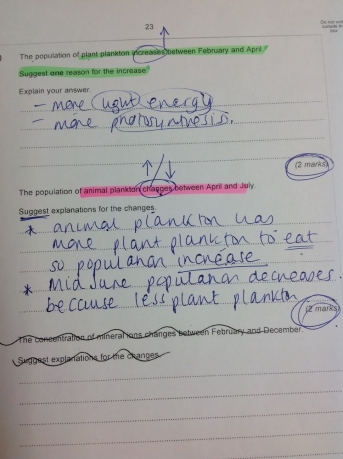
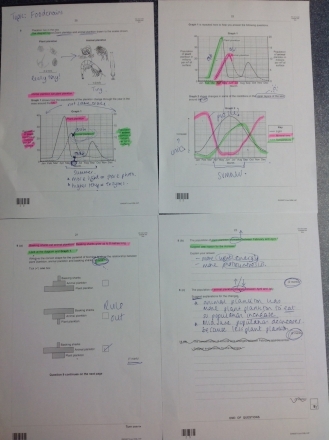
GCSE Biology: Environment and Feeding Relationships

Feeding Relationships Topic Year 9 Student Booklet

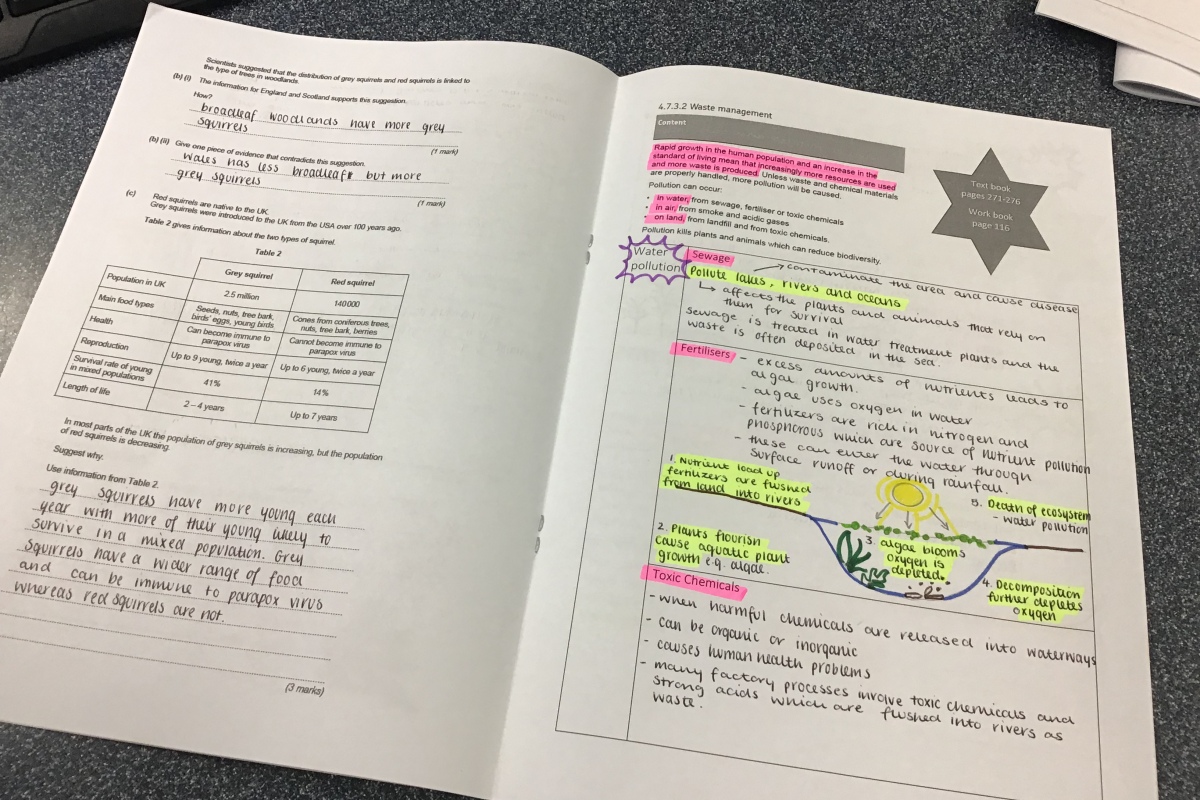
GCSE Biology: Humans and The Environment

Self Study Booklet Humans and the Environment

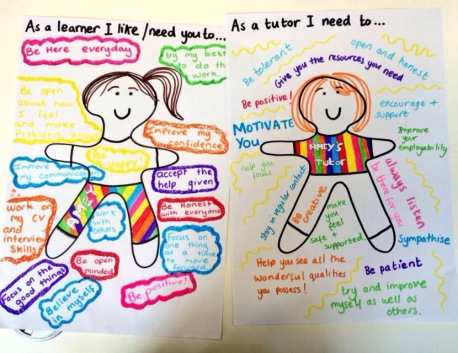
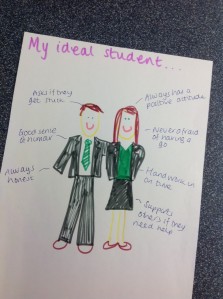
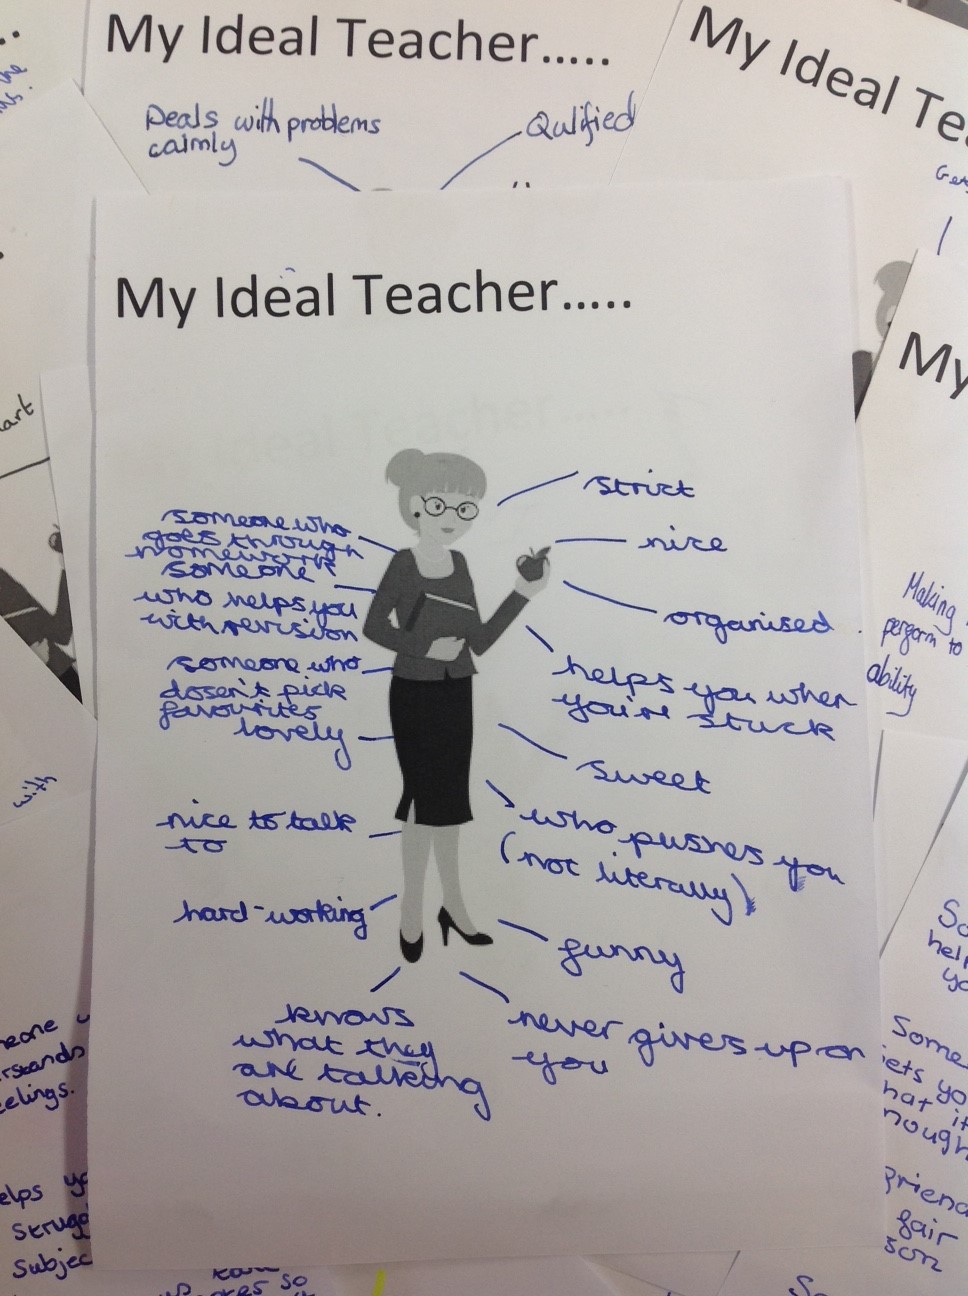
Thank you to Izzy and Katie who let me use photos of their work on here

NEW: Year 7 Science Booklets

We don’t follow the national curriculum so these booklets won’t be usable for most people as they are, but feel free to edit them to suit your own needs:

Y7 Student Booklet Space

Y7 Student Booklet Cells

Y7 Student Booklet Chemical Change

Y7 Student Booklet Classification

Y7 Student Booklet Energy Light and Sound

Y7 Student Booklet Solutions and Mixtures, Acids and Alkalis

How I Teach: Spotting Bad Science

The ability to evaluate scientific methodology has always been a key feature at A-level Biology, but is creeping in more and more to GCSE Biology. Personally, I couldn’t be more happy! This is REAL science and will equip students to be scientifically literate in their every day lives. I’ve been working with Year 11 this week in the context of the disease topic, to evaluate some articles on causes of disease from newspapers. I’ve given them all a copy of this great infographic from Compound Chem to stick in their books and use as a checklist. I’ve accidentally made them too ruthless and have had to back-track a bit today and change the title of this to “spotting bad AND GOOD science!”Image result for compound chemistry spot bad science

Last week I started out by looking at the A-level questions (see resources below) and working through them together using the visualiser. This was they could ‘see’ my thought processes as I pulled my face at small sample sizes and studies conducted in only one country etc. We used these case studies as a chance to think about control groups, blind trials, placebo effect etc and to discuss everything on the infographic. This morning I printed off some articles with wide margins and asked them to annotate evaluation points on them. They’ve done a great job!

Resources:

Alevel past paper questions

Data and Disease Exam Questions

Data and Disease Exam Questions MS

Articles to evaluate

newspaper evaluations

bad science articles to annotate


Managing Practical Science Lessons – Top Tips!

Last week, Physics NQT Charlotte asked Twitter for some tips to manage practical science lessons. She received lots of great replies, so I’ve paraphrased a little and summarised them into this blog post (with her permission). Credits at the end to everyone whose ideas I used.

charlotte
Charlotte’s Tweet!

Room layout

  • Spread the equipment out around the room to avoid bottlenecks.

Following Instructions

  • With younger students, doing a method step by step is useful. You can split up your pairs into person A and person B and issue instructions for each person, followed by a check, and then the next instruction.
  • If the method is complicated or important (e.g. required practical) you can set the homework to be preparing for the practical by reading the method and maybe watching someone do the practical on YouTube. Students could answer some simple questions to prove they have read it.
  • A really simplified diagram of what to do on the whiteboard, with key volumes, temperatures etc is useful to refer back to.
  • Demo the experiment first
  • Don’t assume students know the names of equipment or how to use them properly – show them.

Managing Risks:

  • Insist on googles on from start to end, and then tell students when it’s ok to take them off. Many of the accidents I’ve seen are during tidy-up-time when test tubes of chemicals are splashed into the sink.
  • Students can be trained to complete their own risk assessments, especially as it’s now a skill at A-level. You could have a couple of copies of the student-friendly CLEAPS guide printed.
  • Think about splitting the class for practicals. Half the class can do practical while others do a related written task, then swap. This relies on students doing written task independently but means you have more time for practical students.
  • Explain to Year 7 students what to happen when glass ware gets broken. I tell them they must ask someone to stand guard and then come and see me.
  • Discuss with younger students what to do in case of a chemical spill and with each practical tell them if it safe to clear up their own small spills or not.

Bunsen Burners

  • Don’t let the student’s excitement rush you. Have them set everything up and then make them stand in their places for inspection. You can turn the gas on when you are content everything is safe.
  • Until you gain the trust of the class, or they are experienced enough, you can light the Bunsen burners for the students.
  • If students light their own Bunsens with splints, go around and collect the used splints immediately to avoid the inevitable bonfire!
  • Have a box of spare hair bobbles.
  • Issue a Bunsen Burner license. Year 7s love them! They can assess each other and give feedback
  • Have a one-way system around the room

Clearing Away

  • If you have hot tripods and gauzes which need time to cool before they can go away, have something for the students to do in the interim – a graph or some questions about the practical.
  • You can assign jobs – one pair collect in funnels, one pair collect in test tubes etc. This tends to reduce that “it isn’t mine so I’m not clearing it up” situation.

Using Your Technician and Colleagues

  • Go and watch other teachers and see how they manage practical work. You’ll pick up some great tips.
  • If you or your technician have the time, having a tray of equipment for each group can save valuable time.

What to do in an emergency

  • Don’t be afraid to stop the practical if it seems out of hand, it sends a message.
  • Show students at the start of the year where the emergency cut off button is for water, gas and electricity. Get a few of them to try hitting it. Show them what happens when you hit it.
  • You need to train them with some kind of command which means that everyone stops immediately and listens, e.g. “STOP….LOOK….LISTEN.”

Rewards and sanctions

  • Reward groups with points when you see them doing something safe or carefully. Give the winning team a reward at the end of the lesson.
  • Train your class to know what the consequences of poor behaviour will be. Have a few stools ready somewhere out of the way and send students to sit on them if they break a rule – no second chances. They will learn quickly! This way they can still watch the practical but are safe.
  • Get students in groups and give them roles – eg equipment monitor, safety officer, timekeeper. Give them responsibility for their practical equipment – appropriate sanctions if they aren’t safe, respectful and tidy and take points away if you catch them breaking a rule. The rules: keep your goggles on, only talk about the lab practical, only talk to people in your own group, no pranks/horseplay, no unauthorized experiments. Winning group gets extra credit or prize. Works AMAZINGLY well!

Making it Count!

Know what is likely to be asked at SATs, GCSE and Alevel in terms of practical skills. Make sure you use the same wording and ask those questions to students. Many practicals have dead time while you are waiting for something to happen so use that time productively to do some of these questions.

With thanks to:

Charlotte for posing the original request for advice @ckjackson_

And to everyone who contributed:

Chris @mrbakerphysics

Lindsay @MsTurk_MCSC

Christian @biologyprofe

Helen @hrogerson

RK @missrknipe

@MrsSingleton

Rich @mr_pepperell

Dr de Bear @DrBearScience

Mr BdB‏ @WRBdB

Jessica Marie‏ @jeffucamarie

Mr BdB‏ @WRBdB

Mason Wright‏ @mwright_sci

Wendy Pearmain FCCT‏ @wpearmain1

oocie‏ @Yorks_Bunny

Miss Puttick‏ @Puttique

Dr Sobala‏ @DrSobala

Gill‏ @myorangecrush

Lynne Rawlings‏ @RawlingsLynne

John Mellitt‏ @johnemellitt


Lizzie McGee‏ @McGeeTeach

Chris B‏ @chrisbeason30

Mr. J. Dennis‏ @MrDennis_Sci

Mrs Mol‏ @OldMrsMol

Simone Lively‏ @simiisme

Bibble‏ @Bibblebib

Sue Bull‏ @Sue_M_Bull

Louise Lewis‏ @MissLLewis

James‏ @JamesTurnbull87

oocie‏ @Yorks_Bunny

fozia ahmed‏ @fozia4

Dr Sobala‏ @DrSobala

Gill‏ @myorangecrush


Science @ Gillotts @Gillotts_Sci
JFN‏ @d85_uk

Chris B‏ @chrisbeason30


Using Models in Biology

Some concepts are tricky for students to visualise and become riddled with misconceptions. Getting some props out and building something for them to see, move and discuss really helps aid understanding and allows you to draw out any misconceptions. We have a great little box in the prep room of random bits to build models. Certain things are always useful; I always save the long cardboard tubes from wrapping paper as my go-to prop. Plasticine, pipe cleaners and a range of different sized balls or counters are also useful. Here are a few ideas:

Using a stool and tubes to represent vasoconstriction and vasodilation:

Kidney dialysis using Bunsen hose

dialysis

Mitosis and Meiosis demonstrated using pipe cleaners:

mitosis

I’ll add more as I think of them over the next few weeks but it’d be good to also hear other people’s idea…

Practical Science: Free Choice or Fixed Method?

Last week my second year class (NC Year 8) were given the task of modelling huddling behaviour in penguins as part of our ‘Adaptations’ topic. We watched a 3 minutes BBC Attenborough clip of penguins huddling and I explained the term ‘model’ to them in the science-sense of the word. I then gave them the task of modelling this behaviour using glass ware instead of penguins. The aim of doing this practical, which I shared with them, was for them to practise identifying variables (IV, DV and CVs) and to practise table design. I also wanted them to practise independent experimental design – I had this group last year and we’d made great progress using our “Brain, Book, Buddy, Boards” system before they were allowed to ask me for help. The results of the experiment were not at all important to me.


Arguments for allowing students to design their own experiment:

  • I love seeing students really using their brains rather than following a method in a zombie-like fashion. I want them to think about the problem and to engineer a solution. I love them hearing them discuss with their practical partner how to keep their test fair – in my view this is REAL science.
  • Sometimes, such as in this case, the results don’t matter. Some groups only got one result but they had designed a great experiment and we’d had interesting discussions about their set-up.
  • This way develops independent learning skills – there is no chance to passively partake in a lesson and students have to think for themselves.
  • By allowing students to make mistakes with table design, e.g. variables the wrong way around, mixed units, incomplete headings etc you have a range of great resources to share and discuss with the class. Having just marked their plans I now know ‘O’ is struggling with table design and ‘M’ and ‘J’ need some help with repeatable and reproducible definitions.
  • Key Stage 3 is largely free from needing to know fixed methods and gives students and teachers much more freedom to allow experimental design to develop.

Arguments for asking students to follow a fixed method:

  • Sometimes the results really matter, and if students design a method that just won’t get the results you want there is a danger of them taking home the wrong message from the practical.
  • There are some procedures which are commonly used and asked about in examinations at GCSE and A-level – being familiar with these methods buts exam candidates at an advantage. Examples include bubbling pond weed (very common in KS3 SATS papers and GCSE Biology papers), transpiration experiments, mass change in potato chips etc.
  • This puts less of a burden on the technician – I know our technician despairs of me sometimes when I invade the prep room several times in a lesson because students have asked for weird and wacky pieces of equipment to conduct an experiment. Leaving the lab to go to the prep room might not be practical in some schools. I’m lucky that my lab is connected to the prep room so I can wedge the door open and pop in an out to get whatever students ask for. I’ve avoid this in the past by asking students to design their own method in one lesson and submit an equipment order to do the practical next lesson.
  • Following instructions carefully is a skill in itself – it’s one of AQA’s competencies which my sixth form students are working on.
  • In real world science, replicating a fixed procedure is done to check for the reliability of results.
  • From a selfish point of view it’s much easier to manage a class of students doing a fixed producre and it’s much easier to mark.

Although it looks like there are more arguments for using a fixed method, I most of these arguments are not student centred and I think every decision made in the classroom should be for the benefit of the students. I’m all for maximising opportunities pre-GCSE for students to design their own practicals.

Metacognition & Exam Technique

I’ve seen the term ‘metacognition’ banded around on Twitter recently and it’s definitely something I want to read up on. I also watched a video on John Tomsett’s blog (@JohnTomsett) of friend and ex-colleague Lisa Kirby teaching a maths class about simultaneous equations. She used a technique I often use which I sort of thought was intuitive but it seems it has a fancy name: metacognition! According to the TEAL website, metacognition can include doing the following:

“Teach learners how to ask questions during reading and model “think-alouds.” Ask learners questions during read-alouds and teach them to monitor their reading by constantly asking themselves if they understand what the text is about. Teach them to take notes or highlight important details, asking themselves, “Why is this a key phrase to highlight?” and “Why am I not highlighting this?””

It’s something I always do with GCSE and A-level questions, especially towards the start of the course, to get students used to how to approach questions. Rather than assume that they have an intrinsic understanding of what to do, I model my own thinking. I’ve made my Year 9s a booklet of past GCSE questions to prepare them for their end of year exam and the first question was horrible! Not in terms of subject knowledge but it’s got pages of graphs and diagrams to work through. The question was Question 9 from the June 2013 BL1HP (AQA) about feeding relationships and pyramids of biomass.

Copy of booklet and mark-scheme:

Practise Qs MARKSCHEME for Summer Exam 2015

Practise Qs for Summer Exam 2015

I gave the booklet out to one of my Y9 classes yesterday and was very quickly met by puzzled faces and lots of questions like “what do I do on this page” (referring to a page with no questions, just graphs and text). Today, I took a different approach with another Y9 class and modeled my thought processes with them. MUCH different results!

IMG_4898

I used the Visulaiser to project the image of the question on to the board. I started with the basics – making sure I had a pen and highlighter to hand. I tried to talk aloud every thought process which came into my head which is a little bit weird as lots of things we do without being aware of them (as experienced adults). I read each part of the information carefully, highlighting key words, but more importantly talking about why I thought they were important and what background knowledge I could link to them.

IMG_4900

We looked at the graph showing the population of animal and plant plankton over a year. I talked aloud about things I noticed, like the y-axis scales being different on the left and right, and patterns I noticed in the trends. I talked aloud about the summer being warmer with greater light intensity. I modeled reading figures from the graph and why I chose to do a rough reading rather than a precise one.

IMG_4901

When I’d verbally analysed the data we moved on to look at the questions. I read the questions aloud and talked about the command terms and bullet pointing and looking at how many marks the question was worth.

IMG_4899

To look at this 5 mark question took about 15 minutes. I explained to them that this would happen much more quickly in real life as they’d become faster with practise. I was so impressed with how attentive they were; even the ones who like to race ahead and get on with their work were patient and could see the value in what we were doing. They were really positive when we’d finished the question giving unprompted comments such as:

“I would never have thought to do that”

“I never would have been able to do that”

The Ideal Teacher?

I saw a recent Tweet by @Lousiateacher, retweeted by Pete Sanderson @LessonToolbox about characteristics of the ideal student and teacher (although termed ‘learner’ and ‘tutor’). She posted two pictures with features around the outside which got me to thinking what my students would consider to be the make-up of ideal teacher.

Inspiration

I decided to have a look at this with my first year (y7) form this morning. I had a quick think about features my ideal student would have and read some out as examples.

ideal student

We then spent form time having a think; a little bit of individual time, then some pair chat then some whole-class feedback and discussion.
My form loved it! They were very keen to have their opinions heard.There were so many similarities on their sheets. Their answers were quite predictable

mass

1 2 3

I looked through my form’s responses and tried to summarise them into different sections.

Personality

  • Not easily made angry
  • Good sense of humour
  • Nice to talk to
  • Friendly, but fair
  • Deals with problems calmly
  • KNOWS ME
  • Excited to teach the subject!
  • Never ill!
  • Brings out the best in me because I like them

Academic

  • Pushes me to do my best (keen to make me understand they didn’t mean literally ‘push’!)
  • Marks work on time
  • Helps me if I’m struggling
  • Always goes through homework
  • Knows what they’re talking about
  • Explains things clearly and doesn’t make me feel bad if I don’t understand
  • Makes lessons exciting
  • Covers everything on the syllabus so I’m prepared for my exam
  • Someone who uses our opinions
  • Doesn’t criticize
  • Always makes time for you
  • Doesn’t just give me the answer if I’m stuck
  • Has new and exciting ideas

Classroom Management

  • Makes the shy people speak up in class
  • Doesn’t allow much noise
  • Knows when someone is being distracting and affecting concentration
  • Doesn’t pick favourites
  • Someone who cares about people handing work in on time
  • Explains things before we copy off the board
  • No shouting
  • Not a cover teacher / supply teacher
  • Not disparaging
  • Tidy classroom

Pastoral

  • Stops fights between friends
  • Doesn’t forget your name
  • Calms my worries

So…. what can I learn from this?

It was clear how much my form valued a consistent relationship between themselves and their teachers.

The key thing was they really appreciate being known…. someone who knows their name, their strengths, their weaknesses and treats them as an individual.

One of the things that was interesting was in the whole group feedback, one person said “we really like being asked things like this – our opinions about things”